


 Spring brings up images of flowers, sunshine, and green grass. But we all know that many of these early spring days are riddled with gusty winds and chilly weather, right? So, while waiting to open our doors, we turn to spring cleaning.
Those big cleaning projects can be so cathartic but can quickly become a pain when your little one is simultaneously running underfoot. How can we keep them busy while we empty our pantries and sweep every nook and cranny?
Try one of these up-cycling craft ideas that use the things you would get rid of anyway!
1. Crazy Crayons
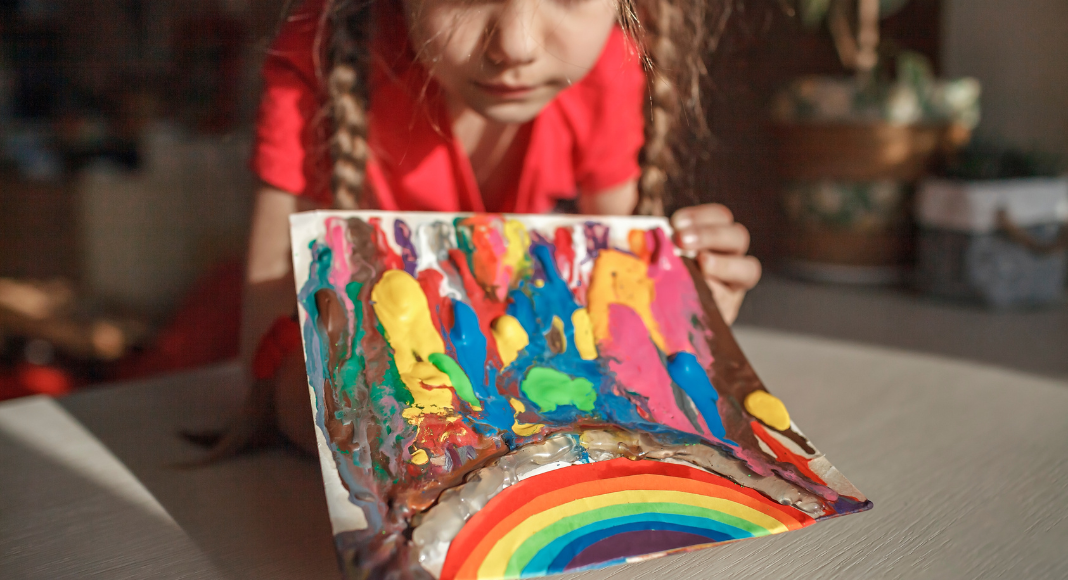
Clean out the kids’ art drawer, but don’t throw away those broken crayons yet! They can be turned into something amazing! Kids will love to help turn their broken old crayons into new, fun, rainbow-colored ones!
Start by peeling all your old broken crayons and breaking them into small pieces. Next, fill silicon molds (or even mini muffin tins) with the broken crayon pieces. Have the kids think about the cool combinations of colors they want to add. One crayon may be lots of blues and white for a sky or another green and brown for a giant lizard. Next, pop them into a 200-degree oven for about 15 minutes (more or less depending on the size of the crayon pieces and how full you made the molds).
Take them out and let them cool completely. If they stick, you can put them in the freezer. Voila! Brand new crayons in fun shapes! The kids will be so excited to color with the new crayons that you might be able to sneak away for enough time to drink a whole cup of coffee—hot!
2. TP Creations
We all have those toilet paper rolls lying around, or is that just the art teacher in me?! Well, if you don’t, save a few (paper towel rolls work, too) and then let the kids get creative! One of my favorite projects with the rolls is spring butterflies.
Here’s what to do. Fold a piece of construction paper in half. Cut out the shape of a butterfly wing along the folded side. Open to reveal two symmetrical butterfly wings. Decorate however you wish. Use the toilet paper roll for the butterfly’s body and see how creative you can get with googly eyes or even some antennae made from pipe cleaner. Your little one will love this whimsical project!
Other ideas include painting the roll and taping off the ends to make a musical instrument, dipping it in paint and printing with it, or taping two together to create “binoculars” for a crazy game of “I Spy!”
3. Old Clothes = New Fashion Fun!
One day, my daughter came down the stairs upset that her favorite leggings no longer fit. She knew I would take them and pop them into the pile of things to be donated, but she didn’t want to let them go. So, I came up with an idea. Why not give them new life?!
If your kids have a little ingenuity and patience, their old clothes can be turned into various things. (Perhaps we should leave this craft to older kids, though, since scissors, hot glue, or sewing needles may be involved.) For example, the bottoms of sleeves or legs of pants can be cut to make a slip dress for a doll. Another cut of the pants can be used to create a nice sash or belt. Old cozy sweaters can be cut into new blankets or pillows for your child’s favorite toys.
Are you not into letting your kid be in charge of a sharp needle? Try this project instead! Take an old colorful sock and fill it 3/4 of the way with rice. Twist to close, then invert the sock back over itself—knot at the top for an instant hacky-sack or stress ball. Before you close up the sock, put one or two drops of essential oils on the rice. Now you have a lovely sachet for newly organized “spring clean” drawers.
4. Roll Out the Dough
Okay, maybe this last one isn’t exactly done with something you’d be getting rid of from spring cleaning, but have you ever made your own play dough with your little one? Homemade dough is non-toxic, cheap, and so fun! (Maybe you can count it as spring cleaning if you use all your old flour!).
Try this recipe:
- 1 cup of flour (whatever kind you have on hand)
- ¼ cup of salt
- 1 tablespoon oil (veggie oil is fine)
- ½ cup of water
- 3 to 5 drops of food coloring
Mix the salt and flour. Warm the water in the microwave for 30 seconds and add the food coloring. Slowly pour it into the flour mixture and mix until it is all absorbed. While mixing, you can add the oil as well. It will be very sticky at the beginning. Store in an airtight container.
Try adding glitter or essential oils. This inexpensive craft will entertain kids for hours, and you will have time to clean up the mess they made after doing all the other crafts!
Need some other ideas? Check out this any-day clay project!


